Monday, January 21, 2019

Puppy and Kitty Party


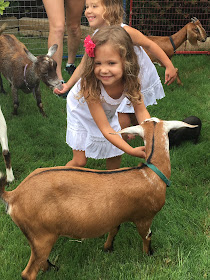
It's no secret that this family loves animals. The girls' past birthday parties have included dolphins and sea creatures for their third Under the Sea Party and a backyard petting zoo for their fourth "Party Animal" themed birthday.


When it was time to plan their sixth birthday I was not at all surprised when they asked for a puppy and kitty party! In fact, I was excited to get this "pawty" started!

We are big supporters of rescue animals and adopting, so it was only fitting that we tied this into the birthday party. The DFW area is full of many wonderful pet rescues but one that is close to my heart is Dallas Dog Street Advocates. Two of the founding members matched us up to our beloved dog, Baloo, two years ago. I have been so impressed with the organization and the work they do that I have continued to help and support them anyway I can. You can visit their page and read more about what they do here.

In lieu of birthday gifts, we asked for donations to the rescue. Over $300 was raised and two large bags packed full of dog supplies were given that day. Thank you again to all who donated! And rest assured the girls also received birthday gifts from family.

Birthday girls
Upon entering the front door, we had a table for donations and paw print stickers on the floor leading the way to the fun. You can find these paw print stickers at Oriental Trading.


The first stop was the family room where Elise from Dallas Dog Street Advocates took the stage. She talked to everyone about what the organization does and showed the girls pictures of dogs available for adoption. Elise also brought a puppy to play with! Sweet and sassy Cassie got a lot of attention from the girls, and Baloo was a polite host to her. Cassie has since been adopted, but DDSA does haveother puppies for adoption!


looking at dogs available for adoption 

After Elise and Cassie packed up, the girls headed over to our Adoption Center! Each guest chose a puppy or kitty of their very own and a balloon dog. These adorable dogs had a leash and floated right along with their new owners.


The puppies and kittens are ready to "paw-ty" too!
With the new pet, each girl received pet vitamins (jelly bellies), dog bones (Scooby Doo snacks) for the pups, and cat treats (goldfish) for the kitty owners.


Once the girls chose their pet, they decorated a pet carrier..

Pet carriers are favor boxes from Oriental Trading and stickers/markers from the Dollar Tree


....and made a collar for their pet. Letter beads allowed the girls to spell out their new pets' names....
Beads and pipe cleaners from Dollar Tree
Don't forget your kitty ears and whiskers! I considered hiring someone to do the face painting but in the end I decided to give it a shot. It was completely amateur work but the girls were happy. I did puppy dog face paint for those who wanted it after looking on Pinterest for a quick tutorial. The girls had so much fun with the face paint, they took over and were doing each others faces.

Headbands from Amazon
Lunch was simple and consisted of a hot dog bar, "paw-ta-to" chips, fruit, and veggies. Lemonade and ice tea for beverages.

The cakes turned out just the way I hoped they would and tasted fantastic! Vanilla cake with vanilla butter cream filling and chocolate cake with peanut butter filling! Puppy and kitty cake pops were on the desert table along with "dog food" (Whoppers chocolates) served in a pink dog food bowl.


puppy dog face paint on this one

Another successful party in the books with sweet friends! Thank you to all who helped celebrate with the girls! And thank you to Elise with Dallas Dog Street Advocates for coming out and bringing Cassie!


 Vendors

Photography: Johnna Anzures (thank you sweet friend!)
Cakes: Mazey Cakes
Cake Pops: Serenity Cakes
Dog Banner: Glam Fete
Balloon Dogs:Amazon
Featured Rescue: Dallas Dog Street Advocates
Party Planner and Stylist:Mrs. Party Planner


For more of my party ideas, home decorating, favorite recipes, twin activities x 2, and all things
"Mrs.Party Planner" please check me out on facebook and "like" the page. New blog posts will appear in your news feed.You can also follow me on www.bloglovin.com, on Instagram and Pinterest


Sunday, January 13, 2019

Gingerbread House Decorating Party


This post is about a month late but planning and hosting parties during the holidays is plenty of work as it is. Not to mention everything else that goes into holiday planning. A quote from one of my favorite movies, A Bad Moms Christmas sums it up, " You're a mom, moms don't en-joy, they give joy". Okay, well I actually do enjoy the holidays but if you are a parent I'm sure you can relate! We make it all happen, mommas!!

Last month I helped sprinkle a little Christmas spirit for my girls and some of their classmates. On a cold and rainy Saturday, eight little ladies in cozy pajamas gathered in our dining room to decorate gingerbread houses. The fireplace was ablaze, Christmas music softly playing, tree lights twinkling, hot chocolate brewing, and lots of giggling echoing through the house.


I made aprons for the girls to wear with my Cricut Air 2 machine. I ordered the red aprons from Oriental Trading and found the gingerbread decal on the Cricut Design App. If you like crafting and have never used a Cricut machine you are missing out! For the longest time I was the DIYer who would rummage around my house to find the right size circle to trace and cut by hand. This machine is a game changer! It does it all for you with precise cuts and fonts. Cards, tags,banners, iron decals, you name it!

It's all done on the Cricut app or website. You decide the size, font, image etc., cut the vinyl and stick on the mat, the machine makes all the cuts, you peel the excess vinyl away, then iron on your material. It took a little time to make eight aprons but I was surprised at how easy it really was.


With eight girls and not much patience for assembling gingerbread houses, I took the plunge and spent extra money on pre assembled houses. I found the houses at our Super Target and they came with the frosting piped and ready to go. Sometimes I take extra steps to save money and sometimes I spend extra to save steps. Many steps and headaches in this case.

Each guest brought one topping for decorations and I had some here too. Red Hots, M & Ms, marshmallows, gum drops, candy lights, Twizzlers, peppermints, and much more within arms reach for each girl to use. Cookies and hot chocolate were on hand to keep the little decorators' tummies filled.


After decorating we had a light lunch, appetizers (I love Trader Joe's variety of frozen appetizers around the holidays), hot chocolate bar and small mimosa bar was also available to the moms.

Note to self: white marshmallows will blend in with white bowls :)


pomegranates and raspberries for the mimosas

hot chocolate break

sweet girls!
finished products

I hope you all had happy holidays! Cheers to a healthy and happy 2019!!!

For more of my party ideas, home decorating, favorite recipes, twin activities x 2, and all things
"Mrs.Party Planner" please check me out on facebook and "like" the page. New blog posts will appear in your news feed.You can also follow me on www.bloglovin.com, on Instagram and Pinterest


Saturday, January 12, 2019

Baked Boneless Chicken Wings


Baked Boneless Buffalo Wings

If you are looking for a game day snack that is also fairly healthy, I've got the perfect recipe for you! These baked boneless wings are ready in under an hour and a fan favorite in this house! I've been making these a few years now since I found the recipe on Pinterest and adapted it to my liking.

Ingredients for Boneless Baked Wings

*3-4 chicken breasts 
*1 1/2 cups of whole wheat flour
*2 eggs
*2 tsp. cayenne pepper
*2tsp. garlic powder
*2-3 Tbsp. butter
*1/2 cup of Franks Red Hot Original Sauce
*cooking spray (I like Chosen Foods 100% pure avocado oil spray)

Pre-heat oven to 350. Cut chicken into small cubes. Prepare two bowls. One for the eggs and one for the whole wheat flour (I like to use King Arthur's brand but any brand will work). Beat the eggs in the first bowl. Mix flour with the cayenne pepper and garlic powder in the second.

Dredge the chicken cubes into the egg mixture first and then toss in the flour mixture. Cover the chicken completely with the flour mixture. Put on a greased cookie sheet, I use the cooking spray to grease instead of butter. Spray a light layer of cooking spray on the chicken and bake for 15 minutes. Halfway through flip the chicken over (this is important in order to get the crispiness) and spray another light layer of cooking spray on chicken. Bake another 15-18 min. 

Meanwhile, melt 2-3 Tbsp. of butter. Once the chicken is done, put it into another bowl and coat with the melted butter and Franks Red Hot Original Sauce. Mix well and serve. I like to  add fresh veggies and blue cheese dressing for dipping.

As with any recipe you can cater to your liking. If you want more spice, add more cayenne pepper. If you like a lot of sauce, add more butter and Franks. But most of all, enjoy!!!


For more of my party ideas, home decorating, favorite recipes, twin activities x 2, and all things
"Mrs.Party Planner" please check me out on facebook and "like" the page. New blog posts will appear in your news feed.You can also follow me on www.bloglovin.com, on Instagram and Pinterest